How to Solve Math Problems Using Google Lens

Update: The Homework mode in Google Lens is now available for all and you can update your Google Lens app to get it.

Google has introduced a new homework filter in its Google Lens service. This new mode  will enable students to solve math problems simply by pointing a camera at it. The feature will help students across the globe in doing their homework when they are not able to attend school during this difficult time of COVID-19 pandemic. Here we will tell you how you can solve math problems using Google lens with the help of this new filter.

Also, read | Study From Home: Tricks to Use Google Class­room Like a Pro

Solve Math Problems Using Google Lens

1] First open Google Assistant by long-pressing home button or swiping up from the bottom corner. From here, press the Google Lens icon.

If you have a Pixel smartphone or Android One phone, then Google Lens is built right into your Camera app. You can access it from there.

You can also download the latest version of Lens app from Play Store which acts as a shortcut to Lens.

2] After accessing Google lens, grant camera permission if required.

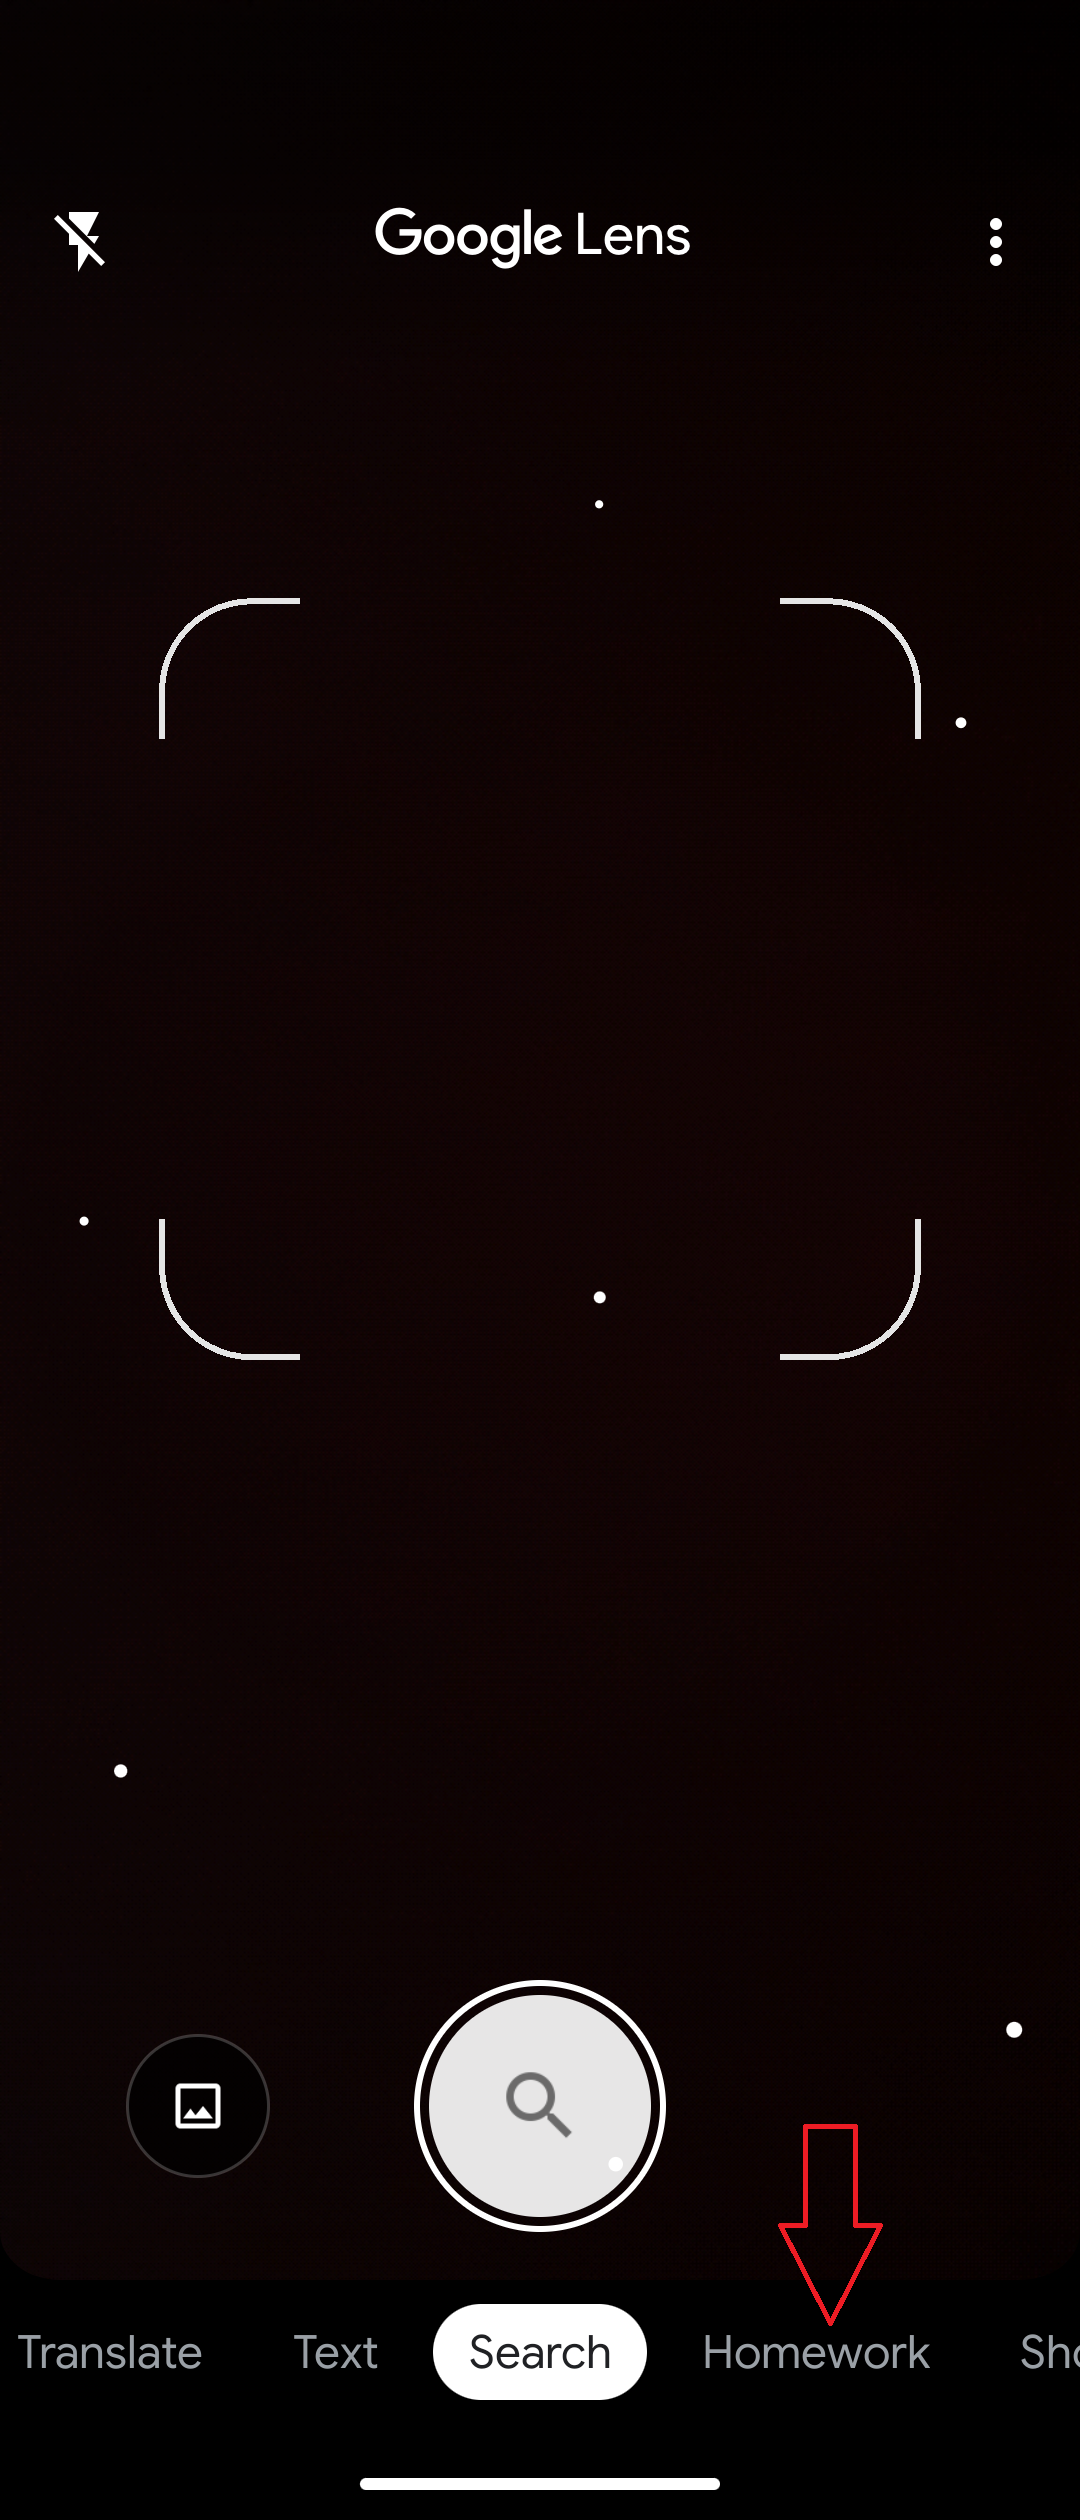
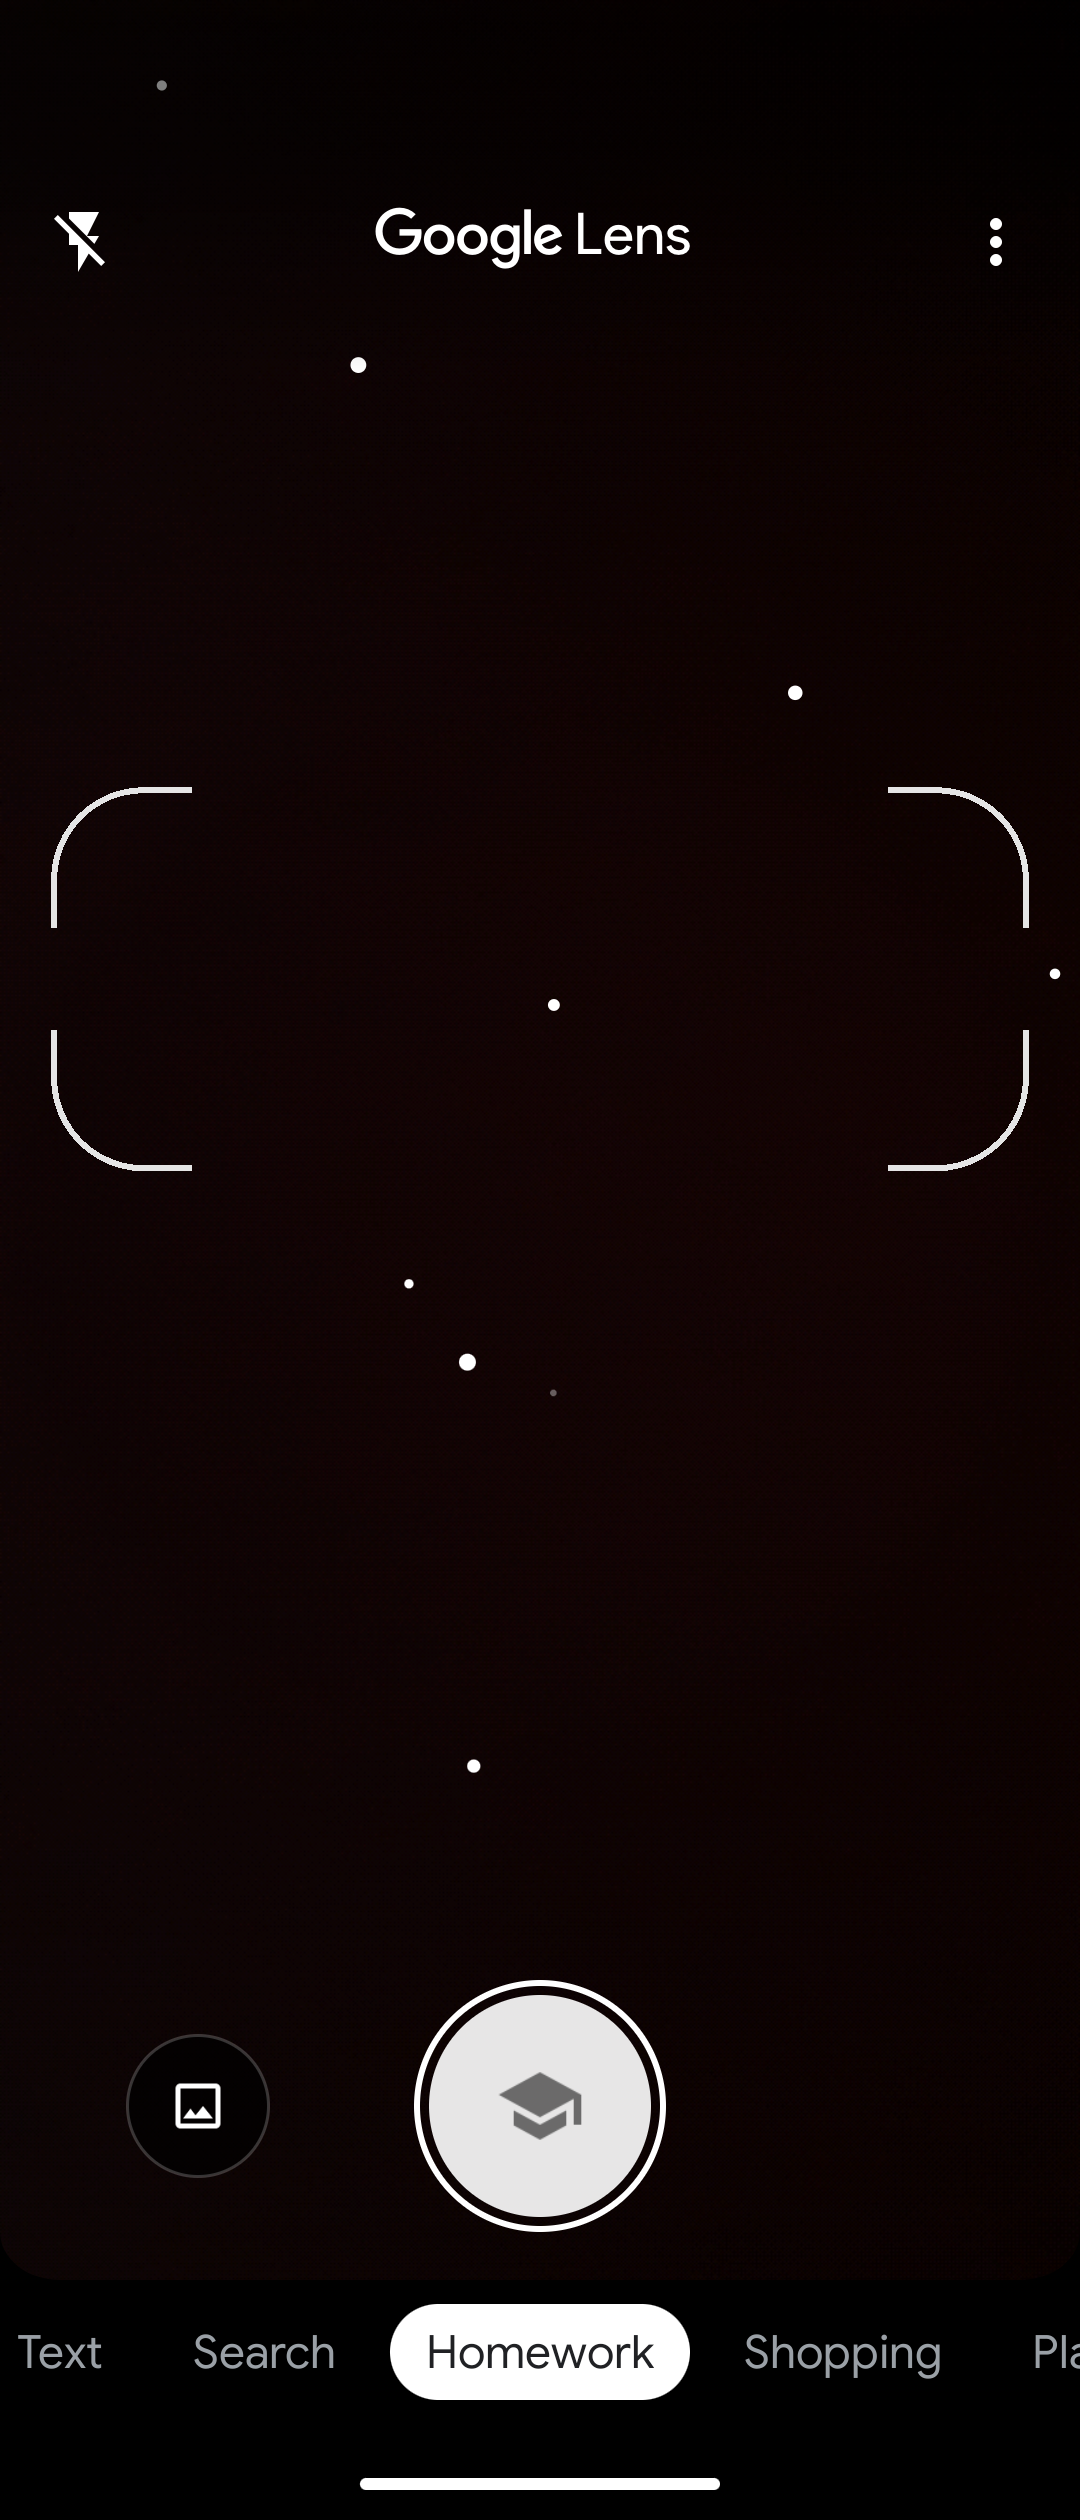
3] Once the camera viewfinder is open, select the ‘Homework’ filter from the menu at bottom bar.

4] Now center the brackets over the math equation until the Google Lens recognizes and highlights it. Then tap the equation, and Lens will solve it.

Google Lens can recognize digitally or handwritten equations.

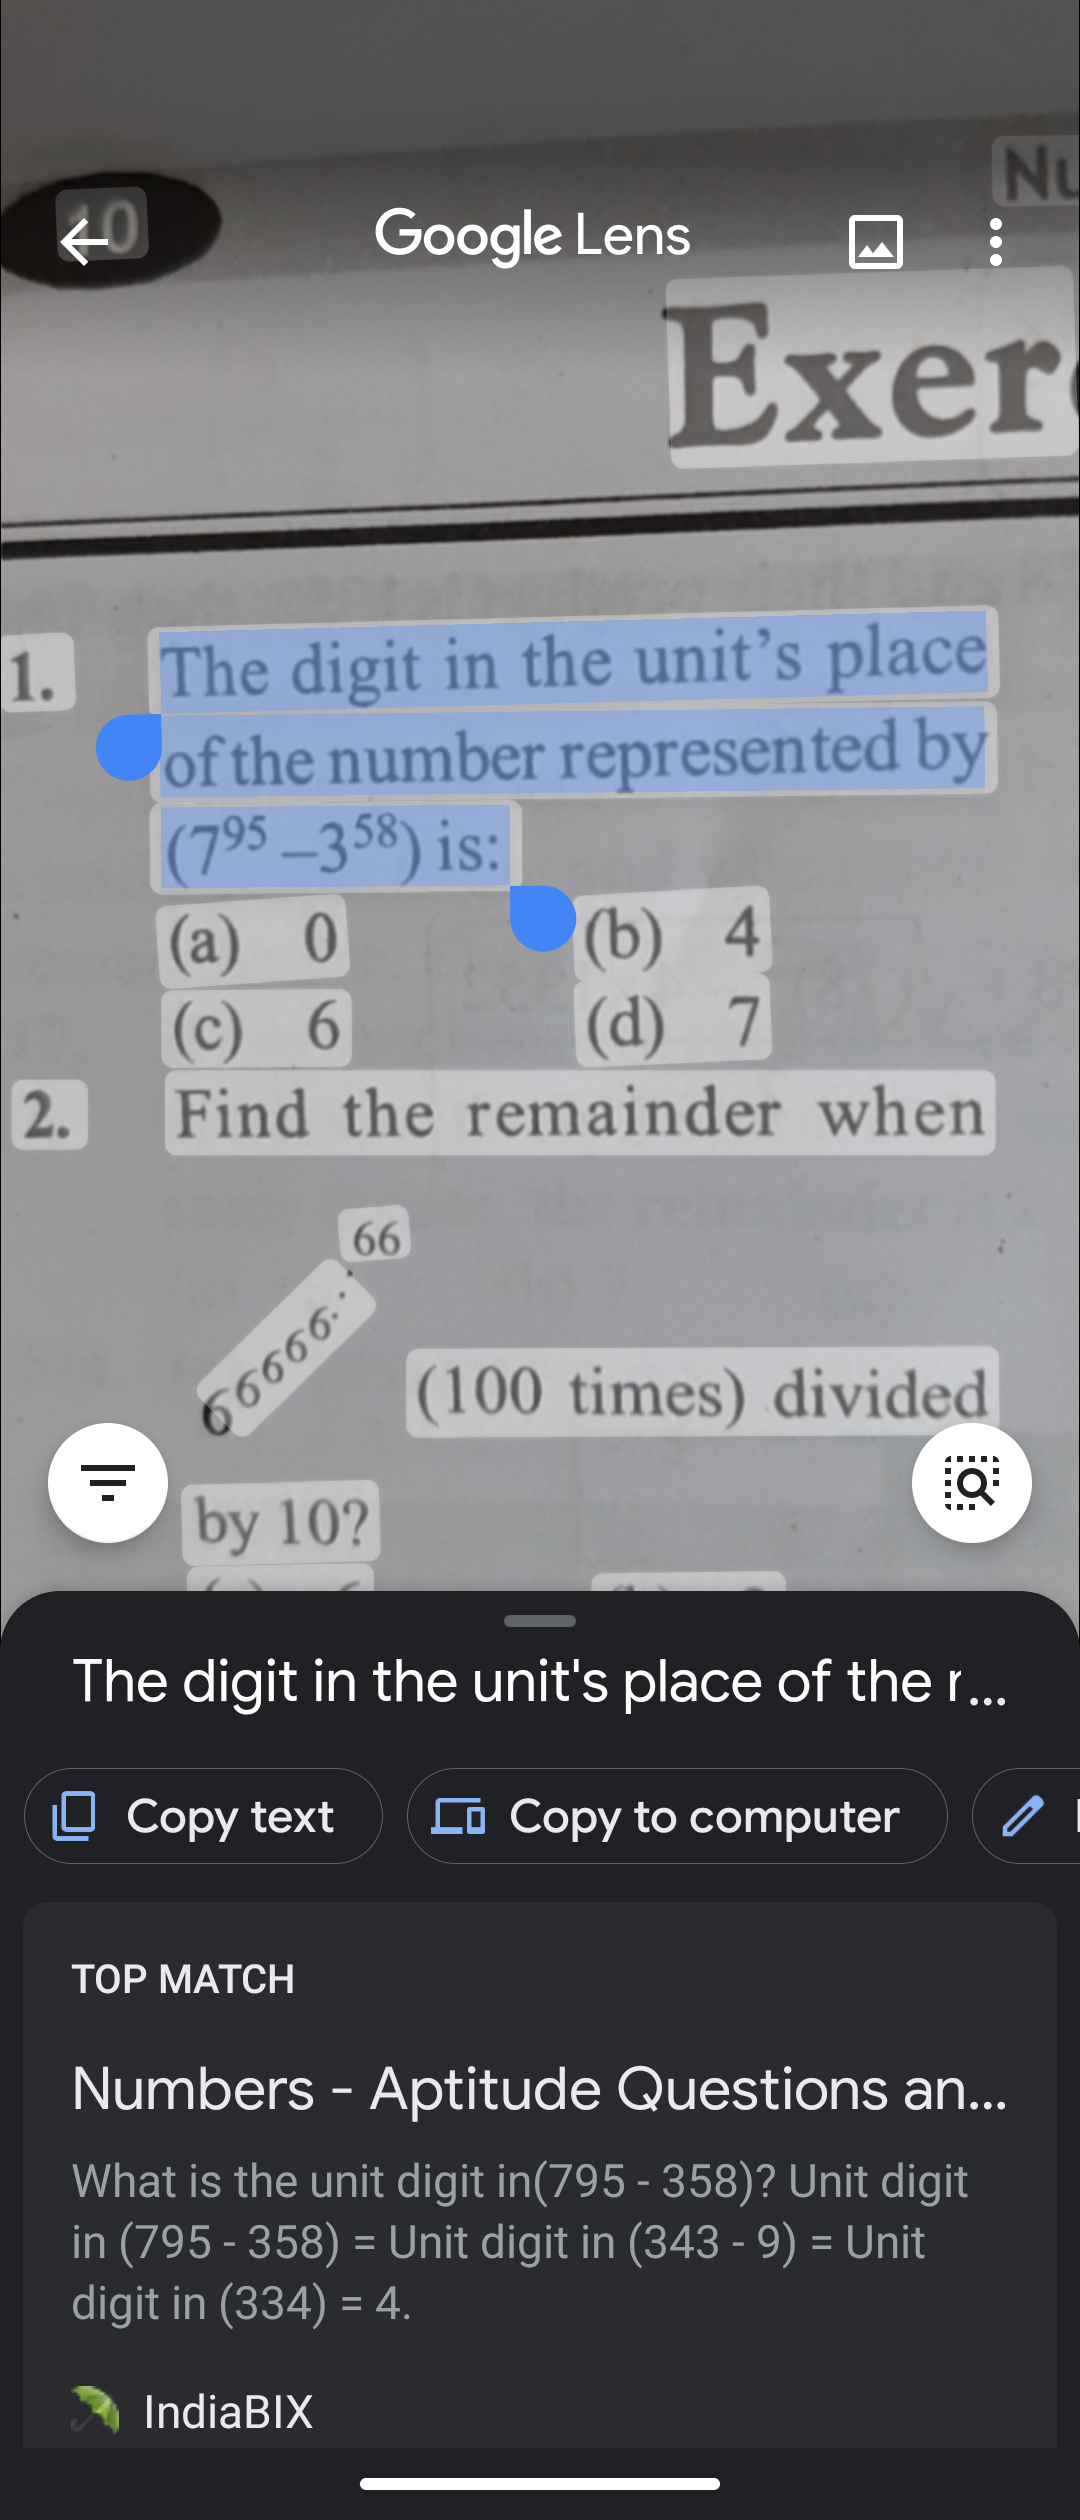
In case of simple math equations, Google provides the steps to solve the problem alongside the solution. However, for complex problems, Google will show the web results to other services. You can also scroll down to find other resources and explanations for such similar problems.

Google has started rolling out this new Homework filter from the US. So the latest Google Lens feature is not available for all users as of now. You will soon get the feature, just keep updating your Lens app from Play Store.

The post How to Solve Math Problems Using Google Lens appeared first on Gadgets To Use.


Source: Gadgets House

marky Saturday, October 31, 2020
Top 3 Free Apps to Sign Docs On Android & iPhone

Signing documents have become much easier with the evolution of smartphones and apps. Previously, you were required to print the document, sign it with a pen, and then scan it again. However, now, you can directly sign a document on your phone as you would do on paper. In this article, let’s have a look at some of the best free to use apps to sign docs on Android and iOS (iPhone/ iPad).

Best Free Apps to Sign Docs On Android & iOS

1. Adobe Fill & Sign

Best App to Sign Docs on Android and iPhone Best App to Sign Docs on Android and iPhone Best App to Sign Docs on Android and iPhone

Adobe Fill & Sign is certainly one of the best apps to sign documents on mobile phones. Using it, you can fill, e-sign, and send any form quickly. It also gives you the convenience to scan forms using your phone’s camera or open a file directly from a web URL or your email.

All you need to do is create a signature, open the form, and place it anywhere you want in the PDF document. When you save your signature, it’s automatically uploaded to Adobe’s Document Cloud and synced to all your devices and apps.

Click here to know how to create signature and sign documents with Adobe Fill & Sign.

  • Developed by: Adobe Inc., California
  • Download: Android | iOS

2. DocuSign

Sign Docs on Android and iOS Sign Docs on Android and iOS

DocuSign is another popular document signing app available for both Android and iOS. You can create your signature, sign the document as required, and upload them via email, Drive, DropBox, Box, Evernote, Salesforce, or photo scanning.

DocuSign also supports remote sign- you can prepare the document with “Sign Here” tags and remind signers to sign with a single tap. It supports most kinds of files, including PDF, Word, Excel, images (JPEG, PNG, TIFF), text, and more.

  • Developed by: DocuSign, California
  • Download: Android | iOS

3. pdfFiller

pdfFiller lets you edit as well as sign PDFs with your Android or iPhone. You can either use PDFs on your phone’s storage or import files from email or web URL. One can sign docs using a legally-binding electronic signature and send documents to be signed by other users via SendToSign.

The app also comes with some handy editing features like adding text blocks, erasing texts or images, highlighting texts, adding fillable fields or drop-down menus, and more. By default, it applies a “verified by pdfFiller” watermark, which can be removed with a simple tap.

  • Developed by: airSlate Inc., Brookline
  • Download: Android | iOS

Wrapping Up

So these were three of the best apps to sign documents on Android and iPhone or iPad. My personal favorite is Adobe Fill and Sign for its straightforward interface and cloud integration. Anyway, which one do you like? Have any other app to recommend? Do let me know in the comments below.

Also, read- How to Send Docs, PDF from iPhone to Android for Free

The post Top 3 Free Apps to Sign Docs On Android & iPhone appeared first on Gadgets To Use.


Source: Gadgets House

marky
How to Edit Photos Using Google Photos New Editor

Google keeps updating it’s Photos app with some new features every now and then. The photo viewing app already has a editing feature which has very editing options. Now. Google at its ‘Launch Night In’ event earlier this month introduced Google Photos new editor tool which lets you edit photos with many more options like adjust various settings, edit suggestions, filters and more.

With tons of new features added to the app, it has become little difficult to edit the photo the way you used to. Here is small step by step guide to tell you how to edit your photos using the new Google Photos editing tools.

Also, read | Stop Google Photos from Backing-up All Image Folders

Steps to edit photos on Google Photos

1] First of all, update your Google Photos app to the latest version from Play Store.

2] Now. open any photo which you want to edit and tap on edit button from below menu.

3] Now you will see many options in the slider when you slide it to left- Suggestions, Crop, Adjust, Filter and More.

4] If you want to use suggested editing by Google AI, tap on any of the suggested option above the slider.

5] If you want to crop it, tap on crop and select your desired size.

6] To adjust various settings like Brightness, Contrast, tap on Adjust and choose any one from above options. Now, change it according to your photo.

7] If you want to apply filter or make a mark on photo, choose the next options.

After applying the changes, tap on ‘Save Copy’ and your edited photo will be saved in the Google Photos next to the original one.

This is how you can edit your photos using the new Google Photos editor tools. For more such tips and tricks, stay tuned with Gadgets To Use.

The post How to Edit Photos Using Google Photos New Editor appeared first on Gadgets To Use.


Source: Gadgets House

marky
TurboHub 6-In-1 USB-C Adapter and Portable SSD for MacBook

TurboHub 6-in-1 USB-C adapter not only allows you to connect more devices to your MacBook, but also serves as a portable SSD.TurboHub 6-In-1 USB-C Adapter and Portable SSD for MacBook

The TurboHub is multi-functional MacBook USB-C dock that measures 121 x 55 x 11mm and weighs 58g. As shown in the images, with the sleek minimalistic design, the USB-C adapter is fully compliant to the style of your MacBook. Meanwhile, the compact form factor lets you easily keep it in you laptop bag.

As a USB-C hub, the TurboHub comes equipped with a 4K@60Hz HDR HDMI port, USB-C port, USB-A port, SD card reader and Thunderbolt 3 port as well as a gigabit Ethernet port. Furthermore, the USB-C port features up to 100W Power Delivery to charge your MacBook and keep other connected devices working stably.TurboHub 6-In-1 USB-C Adapter and Portable SSD for MacBook

The Thunderbolt 3 port also features up to 100W Power Delivery, and with 40 Gbps speed, it allows you to transfer data between your MacBook and Thunderbolt or USB-C enabled storage devices.

Furthermore, the MacBook USB-C dock doubles as a portable SSD that is available in 1TB, 2TB and 4TB, to effortlessly add mass storage capacity to your MacBook. And it delivers read & write speed up to 1200Mbps.

The crowdfunding campaign for TurboHub is ongoing on Kickstarter. We can pledge $110 to preorder the USB-C adapter and portable SSD ($191 for 2TB, $342 for 4TB). All models will be shipped in February 2021.

The post TurboHub 6-In-1 USB-C Adapter and Portable SSD for MacBook appeared first on Gadgetsin.


Source: Gadget Sin

marky
Loupedeck Creative Tool Custom Editing Console for Video, Music and Photo

Loupedeck Creative Tool custom editing console is designed to improve your productivity when you edit your photo, video or music. Let’s have a look if you’re looking for some tools to enhance your workflow.Loupedeck Creative Tool Custom Editing Console for Video, Music and Photo

The Loupedeck CT is a customizable and versatile creation console that measures 5.91 x 6.3 x 1.18 inches and weighs 14.1 ounces. With the compact and slim design, it fits any desktop sizes, and you can easily slide it into your bag and take your favorite workflow with you anywhere.

The creative tool woks with Adobe Lightroom Classic, Photoshop CC with Camera Raw, Premiere Pro CC, After Effects, Illustrator, Audition, Final Cut Pro X, Ableton Live 10 and Streamlabs.Loupedeck Creative Tool Custom Editing Console for Video, Music and Photo

Furthermore, it allows you to assign tools and functions to almost any button, touchscreen, wheel and dial to perfectly match your demands or preference. And the touchscreens intuitively display the functional icons of the software you choose, while the LED backlit ensure it works well in low light conditions.

Moreover, the creative tool allows you to create custom profiles using shortcuts and macros for any application you want to use.

//www.youtube.com/watch?v=HaRam1e8vzc

Loupedeck Creative Tool custom editing console is priced at $549 USD. If you’re interested, jump to the product page for its more details. BTW, Logitech Craft wireless keyboard is another idea to impreove your creation workflow.

The post Loupedeck Creative Tool Custom Editing Console for Video, Music and Photo appeared first on Gadgetsin.


Source: Gadget Sin

marky Friday, October 30, 2020
JBL Go 3 Portable Bluetooth Speaker with IP67 Waterproof Rating

With IP67 dustproof and waterproof rating, JBL Go 3 portable Bluetooth speaker brings your favorite music no mater you’re at home or enjoy the sunshine on the beach. Let’s have a look if you like the Go series.JBL Go 3 Portable Bluetooth Speaker with IP67 Waterproof Rating

JBL Go 3 is the successor to Go 2 portable speaker, which weighs 0.46 lbs. Compared with its predecessor, the new model features colorful fabrics with sophisticated detailing for a more stylish look. Meanwhile, the compact form and integrated fabric loop allow you to easily take it with you anywhere.

The portable Bluetooth speaker comes equipped with a 43x47mm driver with 4.2W RMS output rating to reproduce loud and clear audio with deep bass from the ultra compact size.JBL Go 3 Portable Bluetooth Speaker with IP67 Waterproof Rating

Moreover, JBL Go 3 is IP67 dustproof and waterproof rated to withstand submersion in water up to 1 meter for 30 minutes and dust ingress. In addition, built-in rechargeable battery offers up to 5 hours of playtime between charges.

JBL Go 3 portable Bluetooth speaker is priced at $39.95 USD. If you’re interested, jump to the product page for its more details.

The post JBL Go 3 Portable Bluetooth Speaker with IP67 Waterproof Rating appeared first on Gadgetsin.


Source: Gadget Sin

marky
How to Hide and Unhide Conversations in Google Chat

Amongst other features like smart replies and rooms, Google Chat also lets you hide your conversations. So, if you want to keep a chat private or hidden from others, you can hide it from the main view until you need it. Here’s how you can easily hide and unhide conversations in Google Chat.

Hide and Unhide Conversations in Google Chat

On Web

To hide or unhide chats on Google Chat web or desktop app, follow the steps below.

  1. Open the Google Chat app on your computer or head to chat.google.com.
  2. Hover your mouse’ cursor over the chat you want to hide.Hide and Unhide Conversations in Google Chat
  3. Click the three dots beside the person’s name and tap “Hide Conversation.”
  4. The chat will now disappear from your main view.Hide Chat in Google Chat
  5. To unhide the conversation, search the name of a hidden person or group in the search bar.
  6. Once you tap it, it’ll start re-appearing in the list of chats.

On Android or iOS App

  1. Launch the Google Chat app on your Android or iPhone.
  2. Open a conversation and tap the person/ group’s name on the top.
  3. Here, click on Hide Conversation.
  4. To unhide the conversation, search the person or group name in the search bar.
  5. Open the chat, tap the person or group’s name on the top, and click Unhide Conversation.

Tip- Hide Message History (Auto Delete)

Auto delete Messages Google Chat

If you don’t want to keep a record of your chats, you can auto-delete them by turning off the message history. To do so, launch the Google Chat app on your computer and open a chat. Here, enable the slider with a clock in it.

Once you turn it on, your message history will no longer be saved. All the messages will be automatically deleted after 24 hours. In case you don’t have the Google Chat desktop app, you can install it using this guide.

Wrapping Up

So this was a quick guide on how you can hide and unhide conversations in Google Chat. Besides, we’ve also mentioned the method to auto-delete or turn off message history in Google Chat. In case of any related doubts or queries, feel free to reach out through the comments below.

Also, read- How to Enable or Disable Smart Replies in Google Chat.

The post How to Hide and Unhide Conversations in Google Chat appeared first on Gadgets To Use.


Source: Gadgets House

marky
OnePlus’ short film ‘Stop at Nothing’ shows what OnePlus 8T camera is capable of

The latest OnePlus 8T is one of the best options available in the market under Rs. 45,000 with a slew of flagship features including 120Hz Fluid AMOLED display, Qualcomm Snapdragon 865 mobile platform, a big battery with 65W Warp Charge, and of course, the capable quad-camera set up. Besides performance and fluidity, OnePlus always emphasize … Continue reading "OnePlus’ short film ‘Stop at Nothing’ shows what OnePlus 8T camera is capable of"


Source: Fone Arena

marky
Google One introduces VPN feature for 2TB plans and higher

One of the best ways to keep your secure your identity online is to invest in a VPN. There are many options available to choose from, such as Private Internet Access, ExpressVPN, Nord VPN, etc. Joining this list is Google’s own VPN service, which will come as part of their Google One subscription, specifically for … Continue reading "Google One introduces VPN feature for 2TB plans and higher"


Source: Fone Arena

marky
Samsung SmartThings Find feature can quickly find connected Galaxy devices

These days, misplacing any of our small gadgets can very disheartening and expensive too. To help with this, Samsung has introduced the SmartThings Find feature in their SmartThings App, which Bluetooth Low Energy (BLE) and ultra-wideband (UWB) to find and keep track of of a user’s connected Samsung devices. The feature will work with Samsung … Continue reading "Samsung SmartThings Find feature can quickly find connected Galaxy devices"


Source: Fone Arena

marky
Seo Services